
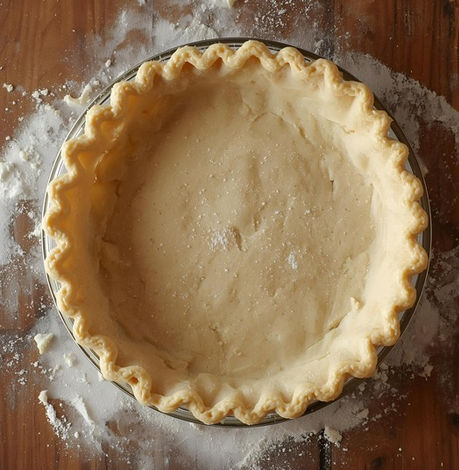
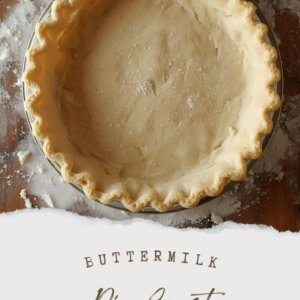
Buttermilk Pie Crust
To me, the most important part of a pie, even more than the filling (which, granted, is super important), is the crust!
A good crust needs to be light, buttery, flaky, and add to the flavor of the filling rather than distracting from it. Complimenting the filling while also being able to stand on its own once you get to the edges! It should work for savory and sweet pies. It should work baked with the filling or baked ahead of time. Able to be baked in a pie tin or a cast iron skillet.
This pie crust has been put to the test and has been found delicious. If you, however, are like me and rarely have buttermilk in your fridge, I highly recommend my all butter pie crust.
Equipment I use:
As an Amazon Associate I earn from qualifying purchases.
Enjoy my recipes and patterns and want to support my site? Want to get a gift for yourself or others at the same time? Check out my Shop! New patterns, supplies, and goodies added regularly.

Buttermilk Pie Crust
Equipment
- Food processor
- Pie tin
Ingredients
- 320 g all-purpose flour (about 2½ cups + 2 Tbsp)
- 1 cup unsalted butter cold, cut into ½ cubes
- 1 tsp salt
- ⅓ cup buttermilk cold, more if needed
Instructions
- In the bowl of your food processor, add your flour, and salt. Pulse briefly to mix.
- Add butter, 1 stick worth at a time. Pulse several times between additions. Pulse a few times until the largest pieces of butter about about pea-sized.
- Add ⅓ cup of cold buttermilk and pulse again to mix. Then add additional buttermilk one tablespoon at a time, testing the batter each time. You want to the dough to mold together like a slightly dry playdough. Don't add too much liquid. A coupld of dry spots are okay.
- Carefully empty the crumbly dough from the food processor onto a clean, dry surface. Divide the dough into two mounds, approximately 60/40. (70/30 for cast iron)
- Gently form the dough into balls. Knead it just enough to that it holds together without falling apart. Do not over knead as it will make a tougher crust. If you see small flecks of butter through your dough that is a good sign of flaky tastiness to come!
- Wrap each ball of dough with plastic wrap and refrigerate for one hour (or overnight if you're preparing in advance).
- Preheat oven to 350°F
- When ready, place the larger dough on a lightly floured surface and roll into a circle until approximately ⅛ of an inch thick.
- Carefully place your rolled out crust on a lightly buttered pie tin or pan or skillet. (See notes for skillet instructions). Using a pair of kitchen scissors, trim the dough to apprixmately ½ to ¾ of an inch from the edge of the pie pan.
- Add your filling (See notes if you are pre-baking a crust).
- Roll out the smaller dough and place on top of the filling. Trim excess dough within ¾" of the rim of the pan. Fold the edge of the rop piece of dough over and under the edge of the bottom piece of dough, pressing together.
- Press edges with fingers or with a fork to form edge crust.
- Score the top of the pie (if not making a lattice) so that steam can escape.
- Optional, brush top of pie with egg wash for a lovely golden brown sheen. (egg wash is 1 egg with 2 Tbsp water)¾
- Bake for 45-75 minutes, or until crust is fully baked and browned. (Depends on thickness of crust and fillings)
- Allow to cool for at least 1 hour before serving.
Notes
- For cast iron pies, a few alterations need to be made as the dimensions of a 10″ cast iron skillet need to be taken into consideration.
- When placing your bottom crust in the pan, trim to the edge of your cast iron, without leaving an overhang.
- Add your filling no more than 3/4 of the way up the sides of the pan, anything more will not bake correctly.
- Drape the excess pie crust over your filling. If you are making a lattice, press the edges of the lattice into your crust. If you are making a solid top crust, lay it over the top, trim just above the top of your existing lower pie crust. Press the two crusts together against the inner wall of your skillet.
- For pre-baked pie crusts (such as might be required by custard pies)
- Complete all of the above steps as for a traditional pie, however you can cut the recipe in half since you will not require the top crust.
- Place the rolled out dough in your pie tin/pan and freeze for at least half an hour. (Not recommended for cast iron)
- Line the pie crust with aluminum foil, leaving a few inches of overhang on each side.
- Fill with pie weights. (store bought clay, dry beans, rice, sugar, etc)
- Bake at 350 for 45-50 minutes if the filling will require further baking. Bake for 60-75 minutes if it will not need to bake further.


4 Comments
Pingback:
Pingback:
Pingback:
Pingback: