
I-chord Wrist Distaff Tutorial
This is a quick tutorial for how to make a wrist distaff.
What is a distaff, you ask? Wikipedia summarizes rather succinctly – A distaff is a tool used in spinning. It is designed to hold the unspun fibers, keeping them untangled and thus easing the spinning process. It is most commonly used to hold flax, and sometimes wool, but can be used for any type of fiber.
Enjoy my recipes and patterns and want to support my site? Want to get a gift for yourself or others at the same time? Check out my Shop! New patterns, supplies, and goodies added regularly.

As a new spinner I am always on the lookout for useful tools, especially ones that I can make myself. I found this wrist distaff a simple project (only about 15 minutes), that greatly assisted me in fiber management and drastically improved the quality of yarn I was spinning.
There are many different types of distaff, some that are staff like, some that are next to you as you’re spinning, some that involve a wooden spool you wear on your wrist. This is a simple, hanging-string, wrist distaff.
Supplies you will need:
- Yarn (a few yards of scrap should do it)
- 8 small weights (heavy glass beads, washers, metal rings, etc)
- A knitting spool (optional)
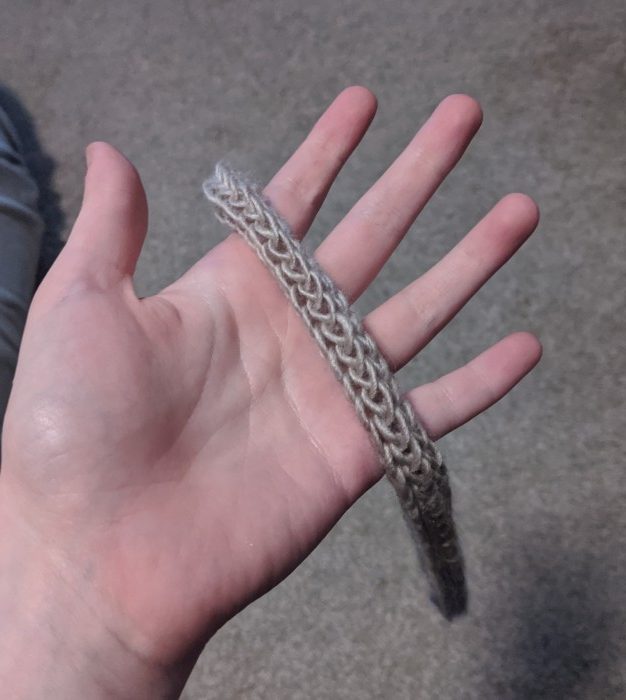
The first thing you’ll need, is some ‘chord’. I made an i-chord using a knitting spool, however a nice thick braid would also work quite well. (Note: if you are braiding your chord, you’ll ideally want to braid 12 (three clumps of four) strands of yarn together, leaving approximately 18 inches at the top and bottom of your chord un-braided.)
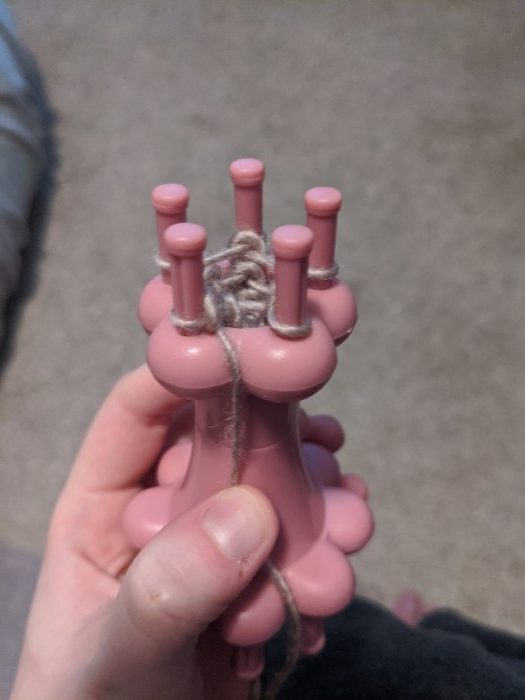
Whether you make your chord using a knitting spool or a braid, you’ll want to make sure that the chord section is long enough to comfortably wrap around your wrist twice.
Next you’ll want to attach the stands of yarn (chord, string, etc) that will be holding your fiber. Ideally four stands on each end of your chord. These can be tied on, crocheted on, or even be the loose ends of the chords you were braiding.
You will also need a small weight for each of your strands (8 total). Ideally these would be heavy enough to hang straight down from your yarn (you don’t want your strands of yarn to be in control), but not so heavy that having 8 of them in addition to your fiber will tire your arm remarkably quickly. I used 8 rings that I happened to have off of an old belt, however washers or glass beads would work as well.

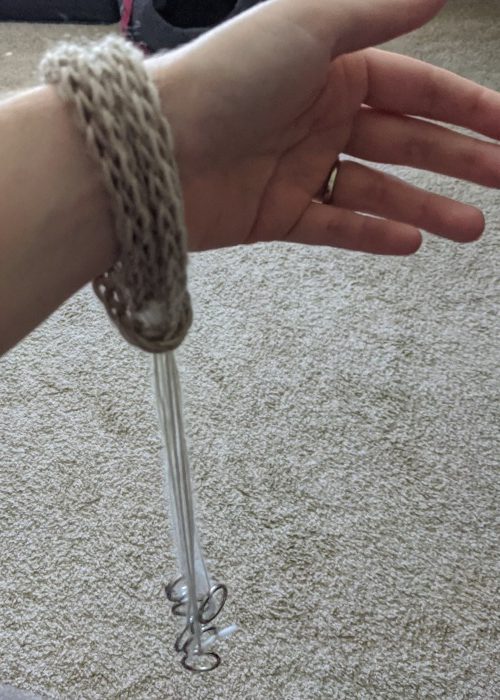
To use your distaff, you will want to drape the curve of the chord over your wrist, and pull the strands through the loop that is created. (I’m a visual person in this case, so here is a picture below.
To load your distaff, separate out two of the strands from one end of your distaff, and place the tale of your fiber between them. Loosely wrap your fiber around the downward hanging strands, and this will create an easy to use distaff for fiber management!
For an easy to follow video on how to use this style of wrist distaff, please check out this video (It’s not me, but I found it quite useful and straightforward.)


One Pot Cheesy Goulash

You May Also Like
Roasted Pumpkin Seeds
Seeded Rye Beer Bread – for the bread machine